

How to Review a Seedream 5.5 Teapot Hero Before Building a Contact Sheet
A practical inspection workflow for a revised pistachio ceramic teapot still, with keep, revise, and reject checkpoints before catalog review.
What's new on this page
- — Page published.
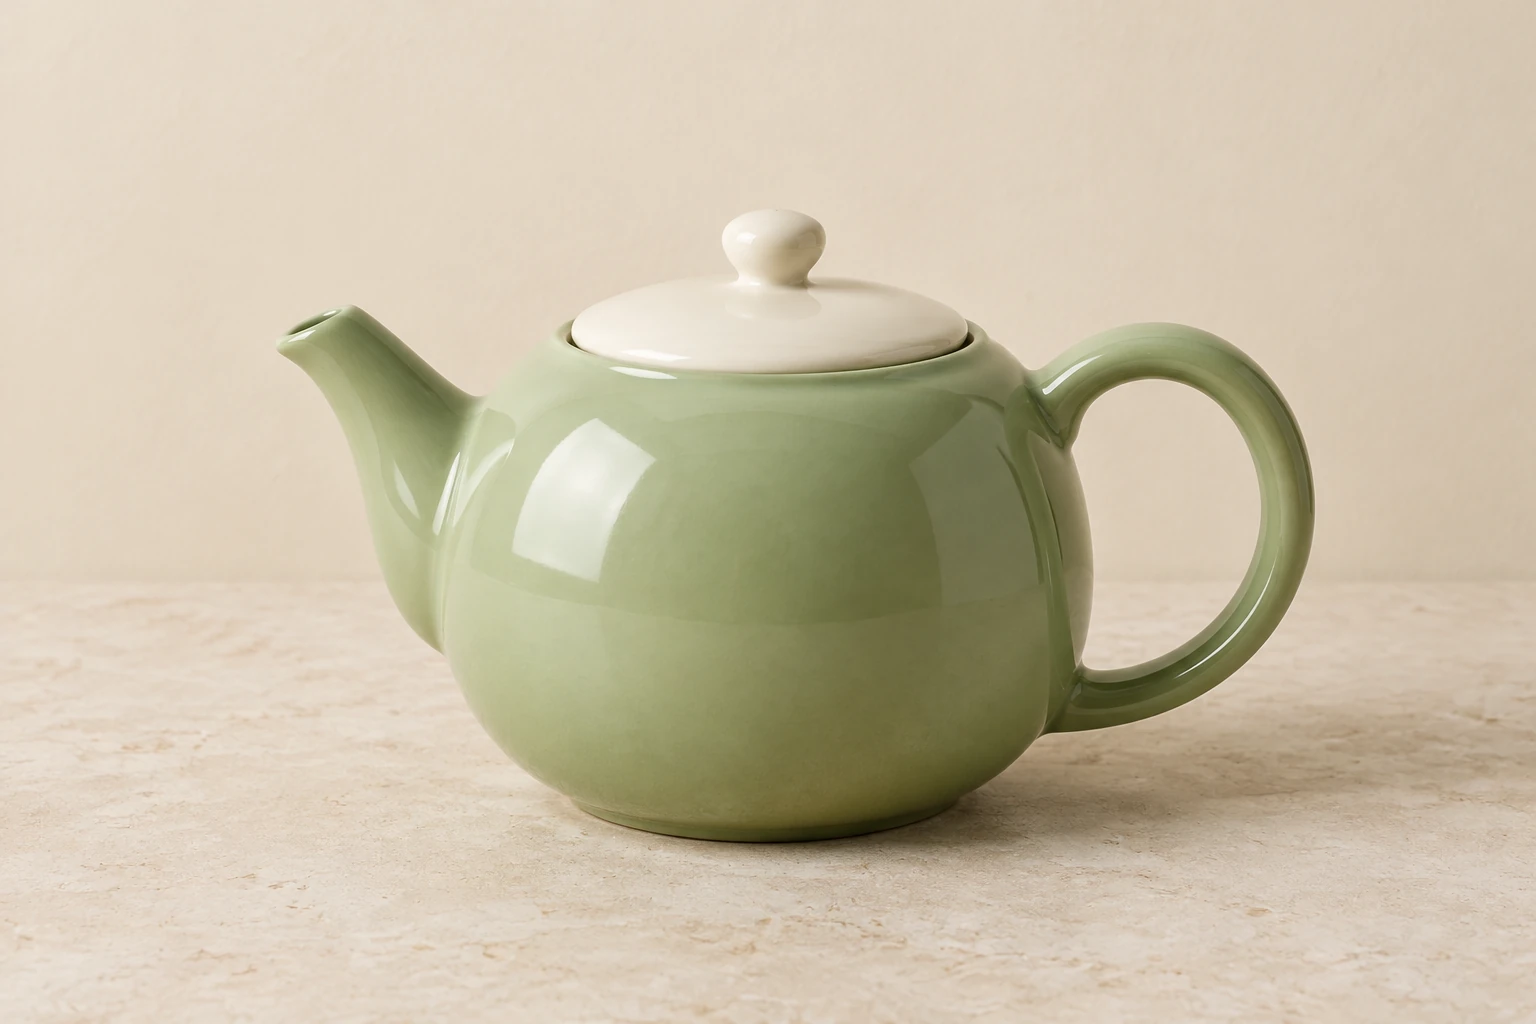
A polished hero still is not automatically ready for a product catalog. Before you build a contact sheet, inspect whether the image communicates the actual object clearly at both full size and thumbnail scale. When reviewing a Seedream 5.5 revision of a pistachio ceramic teapot, review the glaze, handle, outlines, spout, shadow, and crop in a fixed order. Record the decision for each checkpoint so a small visual flaw does not disappear among otherwise attractive images.
Start with the product’s visual facts
Write down what the hero still must preserve: the teapot’s pistachio color, ceramic finish, silhouette, handle opening, spout shape, and the framing needed for the catalog. Treat these as review criteria, not as assumptions about how an image was created. If you are creating a new image from text, the Seedream 5.5 tool is available for text-to-image use without an upload. For a focused revision, switch the same tool to Image to Image and supply one reference. If the photograph already captures the product accurately and only the backdrop needs removing, use the product background remover.
Open the revised still at a size where you can see edges and surface reflections. Then look at it again at the approximate size it will occupy in the contact sheet. A detail that looks plausible when enlarged may become an unreadable blob when reduced.
Inspect in six passes
1. Glaze specular reflections. Look for bright reflected highlights on the ceramic. They should read as reflections on a curved, glazed surface, not as white patches that obscure the pistachio color or make the pot look dented. Check whether the highlight changes sensibly across the body and lid. Keep if the finish remains legible and the body’s shape is clear. Revise if a highlight hides an important contour or makes one area appear like a hole. Reject if the reflections repeatedly make the material or silhouette hard to interpret.
2. Handle opening. Trace the handle’s inner edge all the way around. Confirm that the opening reads as a real, continuous space rather than a painted-on loop, a blocked gap, or an accidental notch. Check the attachment points where the handle meets the body. Keep if the opening is clean and the connections look coherent. Revise if one edge is uneven but the handle remains recognizable. Reject if the opening collapses or the handle’s construction is confusing.
3. Fake outlines. Scan the silhouette against the background, especially around the lid, handle, and spout. Look for pale halos, dark borders, doubled edges, or stray lines that make the object look cut out with a marker. A sharp product edge is useful; an outline that does not belong to the object is not. Keep when the edge is clean at both full size and thumbnail scale. Revise when a small halo can be isolated. Reject when false contours run through several important parts of the teapot.
4. Spout geometry. Follow the spout from its base to its tip. It should have a readable connection to the body and a consistent path to the opening. Check that it does not merge into the pot, narrow abruptly, or end in a shape that could be mistaken for a handle or ornament. Keep if its direction and opening are clear. Revise if the tip needs a more defined edge. Reject if the spout’s form is structurally ambiguous.
5. Contact shadow. Inspect the area immediately beneath the teapot. The shadow should help the object sit on its surface without swallowing the base or creating a visible gap. Check whether its darkest area is tucked near the contact point and whether its softness suits the rest of the image. Keep if the base feels grounded. Revise if the shadow is too detached or too heavy. Reject if the object appears to float or the shadow makes the base shape unreadable.
6. Thumbnail cropping. Reduce the image to the size it will appear in the contact sheet. Confirm that the lid, handle, and spout remain visible and that the teapot is not clipped awkwardly. Check breathing room around the silhouette. Keep if the object is instantly identifiable at a glance. Revise if a tighter or looser crop would clarify it. Reject if essential parts disappear at the intended display size.
Use a problem-specific revision prompt
Avoid asking for a broad improvement when you have found one localized issue. Name the part, describe the problem, and state what must remain unchanged. For example: “Refine only the teapot’s handle opening so it reads as one continuous, clear opening with coherent attachment points. Preserve the pistachio glaze, body silhouette, lid, spout geometry, lighting, and framing.” Review the next version against the same checkpoints; a targeted instruction is not proof that the issue has been fixed.
Keep a short review log
Record these fields for each version:
- Version: [file or label]
- Keep: [approved details]
- Revise: [one specific issue]
- Reject if: [non-negotiable flaw]
- Thumbnail check: [pass, revise, or fail]
For example: “Keep: glaze color and spout. Revise: halo on handle edge. Reject if: opening becomes blocked. Thumbnail check: pass.” This makes the next decision easy to compare without turning the contact sheet into a general mood board.
Know when to use the photographer’s original
Use the actual photographer’s original instead of revising the generated or edited still when the catalog must show a specific photographed unit and the revision changes a meaningful product fact. For instance, if the teapot’s real handle opening or spout profile differs from the revised still, do not treat visual cleanup as a substitute for accurate product representation. Return to the original photograph and follow the catalog’s requirements for that item. Once the hero passes all six checks and remains recognizable as a thumbnail, it is ready to join the contact sheet for review.